Table of Contents
There’s something undeniably magical about red velvet brownies—the perfect balance of rich cocoa flavor, a hint of tang, and that signature vibrant hue. If you love the classic decadence of red velvet cake brownies with cream cheese, you’re in for a treat!
Imagine biting into a fudgy, chocolatey brownie with a velvety texture, topped with a luscious cream cheese frosting that melts in your mouth. Whether you’re craving an indulgent dessert for a special occasion or simply want to elevate your baking game, this red velvet brownies recipe is guaranteed to impress.
These brownies are not just beautiful; they’re incredibly easy to make and versatile. Want to take it up a notch? Try swirling in a creamy cheesecake layer to create red velvet cheesecake brownies—a dreamy combination of two beloved classics.
Ready to bake a batch you’ll fall in love with? Let’s get started! ❤️
Key Benefits of Red Velvet Brownies
What makes these red velvet brownies so irresistible? It’s the perfect combination of a fudgy, chocolatey brownie with the slight tang of red velvet cake and the creamy richness of cream cheese frosting. Whether you’re a seasoned baker or a first-timer, this recipe is designed to be easy, approachable, and foolproof. Here’s why you’ll love them:
✔️ Rich & Fudgy Texture – Unlike traditional cake-like brownies, these red velvet brownies are moist, chewy, and deeply chocolatey, thanks to a perfect balance of cocoa powder and buttermilk.
✔️ A Decadent Flavor Duo – The classic red velvet flavor, paired with a luscious cream cheese frosting or a swirl of cheesecake filling, creates a heavenly bite every time.
✔️ Easy to Make – No fancy ingredients or complicated techniques here! This red velvet brownies recipe is simple, straightforward, and beginner-friendly.
✔️ Versatile & Customizable – Want to take them up a notch? Transform them into red velvet cheesecake brownies with a creamy swirl or add chocolate chips for extra indulgence.
✔️ Perfect for Any Occasion – Whether you’re baking for Valentine’s Day, birthdays, holidays, or just because, these brownies are guaranteed to impress.
These red velvet and cheesecake brownies are the ultimate crowd-pleaser, combining classic flavors with an irresistible homemade touch. Let’s dive into the recipe and bring this delicious dessert to life!
Ingredients for Red Velvet Brownies
Before we dive into baking, let’s gather everything you’ll need. These red velvet brownies use simple, pantry-friendly ingredients to create a rich, fudgy texture with that signature red hue. Whether you’re making classic red velvet brownies with cream cheese frosting or adding a cheesecake swirl, these ingredients will give you perfect results every time.
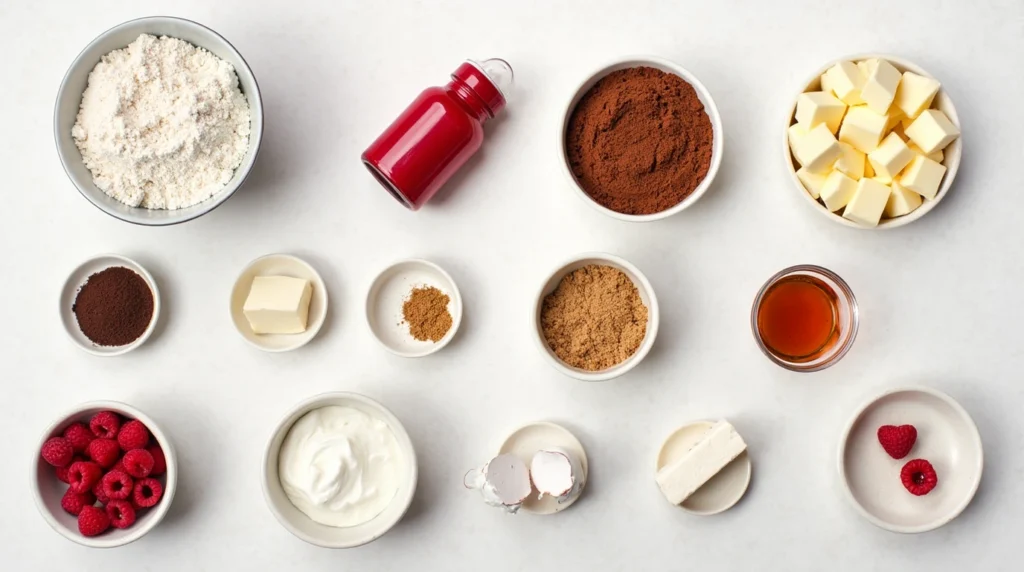
For the Brownies:
- 1 cup (226g) unsalted butter, melted
- 1 ½ cups (300g) granulated sugar
- ½ cup (100g) brown sugar, packed (adds moisture and depth)
- 2 large eggs, room temperature
- 1 tablespoon red food coloring (gel-based for vibrant color)
- 1 teaspoon vanilla extract (for warmth and balance)
- 1 teaspoon white vinegar (enhances the red velvet flavor)
- ¼ cup (25g) unsweetened cocoa powder (for a rich chocolate taste)
- 1 ¼ cups (156g) all-purpose flour
- ½ teaspoon baking powder (for the perfect texture)
- ¼ teaspoon salt (to enhance all the flavors)
For the Cream Cheese Frosting (Optional but Highly Recommended!):
- 8 oz (226g) cream cheese, softened
- ½ cup (113g) unsalted butter, softened
- 2 cups (240g) powdered sugar
- 1 teaspoon vanilla extract
For a Red Velvet Cheesecake Brownie Swirl (Alternative Option):
- 8 oz (226g) cream cheese, softened
- ¼ cup (50g) granulated sugar
- 1 large egg
- ½ teaspoon vanilla extract
Ingredient Notes & Substitutions:
✔️ Food Coloring Alternative: Don’t have red food coloring? Try using beet powder for a natural alternative.
✔️ Make it Extra Chocolatey: Add ½ cup of chocolate chips for an indulgent touch.
✔️ Dairy-Free Option: Swap butter for coconut oil and cream cheese for a dairy-free alternative.
Now that we have everything ready, let’s move on to making these moist red velvet brownies that are sure to impress!
Instructions for Red Velvet Brownies
Now that we have our ingredients, it’s time to bring everything together and bake these delicious red velvet brownies! The process is simple, and I promise you won’t have to worry about any complicated steps. Let’s break it down:
1. Preheat Your Oven & Prepare the Pan
Start by preheating your oven to 350°F (175°C). This is the perfect temperature to get that fudgy, melt-in-your-mouth texture. While the oven is warming up, grease and line a 9×9-inch baking pan with parchment paper or lightly butter it. This will make it easier to remove the brownies once they’re baked.
2. Mix the Wet Ingredients
In a large mixing bowl, beat together the melted butter, granulated sugar, and brown sugar until smooth and well combined. You want a creamy base to start with. Add in the eggs, red food coloring, vanilla extract, and white vinegar, mixing until everything is fully incorporated. This combination creates the base for your beautiful red velvet brownies.
3. Sift the Dry Ingredients
In a separate bowl, sift together the unsweetened cocoa powder, flour, baking powder, and salt. Sifting helps avoid any lumps and ensures an even distribution of the dry ingredients, which is key for that smooth brownie texture.
4. Combine Wet and Dry Ingredients
Slowly add the dry ingredients to the wet mixture, stirring gently until just combined. Don’t overmix—this is where you’ll achieve that fudgy texture you love. The batter should be thick, rich, and slightly glossy.
5. Pour and Bake
Pour the brownie batter into the prepared pan, spreading it out evenly. Bake for about 25-30 minutes or until a toothpick inserted into the center comes out with just a few moist crumbs (not wet batter). Be careful not to overbake—red velvet brownies are meant to be soft and moist, so a little gooeyness in the center is a good thing!
6. Optional Cream Cheese Frosting
While the brownies are cooling, make your cream cheese frosting by whipping together cream cheese, butter, powdered sugar, and vanilla extract until smooth and creamy. Once the brownies have cooled to room temperature, spread the frosting generously over the top for an indulgent finish.
7. Optional Cheesecake Swirl
For a red velvet cheesecake brownies twist, gently swirl the cheesecake batter (cream cheese, sugar, egg, and vanilla) into the brownie batter before baking. Use a knife to create a marbled effect, then bake as usual. This adds a creamy, tangy layer that perfectly complements the rich, chocolatey brownie base.
8. Cool & Serve
Allow your red velvet brownies to cool completely in the pan. If you’ve added the cream cheese frosting, refrigerate them for about an hour to let the frosting set. Once cooled, cut into squares and serve. Trust me, the wait will be worth it!
With these easy red velvet brownie steps, you’re just minutes away from enjoying a delicious, decadent dessert that will leave everyone asking for more. Ready to enjoy? Let’s dig in!
Pro Tips and Variations for Red Velvet Brownies
To make sure your red velvet brownies turn out perfect every time, here are a few pro tips and delicious variations you can try. Whether you’re looking to add a personal touch or elevate your baking game, these suggestions will help you take your brownies from good to absolutely irresistible!
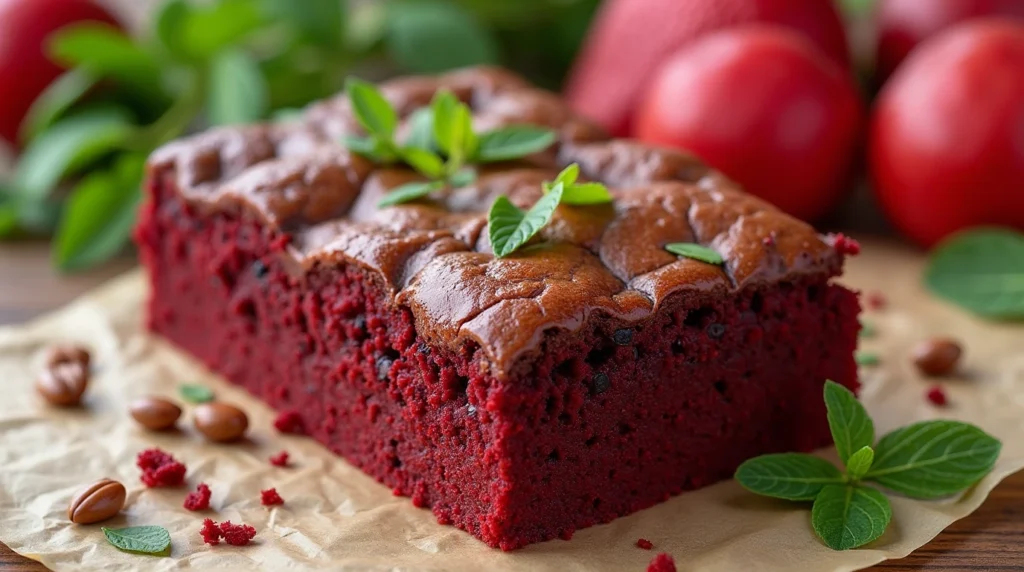
Pro Tips for Perfect Red Velvet Brownies
- Use Room Temperature Ingredients – For the best texture, make sure your butter, eggs, and cream cheese are at room temperature. This helps everything blend smoothly, ensuring your batter is lump-free and silky.
- Don’t Overmix – When combining the dry and wet ingredients, be gentle! Overmixing can lead to dense, cakey brownies. Stir until just combined to maintain that fudgy texture.
- Check for Doneness – Every oven is different! Start checking the brownies around 25 minutes, and use the toothpick test to make sure they’re not overbaked. A few moist crumbs on the toothpick means they’re perfect!
- Chill for the Perfect Frosting – If you’re using cream cheese frosting, refrigerate the brownies for about 30 minutes after frosting. This allows the frosting to set and helps you cut neat, beautiful squares.
- Let the Brownies Cool Completely – While it might be tempting to dig in right away, let your red velvet brownies cool completely before cutting. This ensures they hold their shape and gives the flavors time to meld together.
Creative Variations to Try
- Red Velvet Cheesecake Brownies – For a dreamy twist, add a cheesecake layer to the middle of your brownies. Simply swirl a cheesecake batter (cream cheese, sugar, egg) into the brownie batter before baking. You’ll get a perfect combination of creamy cheesecake and fudgy brownie.
- Chocolate Chips Galore – If you love that extra hit of chocolate, fold in semi-sweet chocolate chips or even white chocolate chips into your brownie batter before baking. The result? Chocolatey goodness in every bite!
- Nuts for Brownies – For a bit of crunch, toss in some chopped walnuts or pecans into your batter. The nutty flavor complements the rich, tangy taste of the red velvet beautifully.
- Swirled Cream Cheese Frosting – Instead of a full layer of frosting, swirl the cream cheese frosting on top for a lighter, visually stunning effect. This works especially well if you’ve added the cheesecake swirl to the brownies!
- Red Velvet Brownie Bars – Make a thicker version of these brownies by increasing the baking time slightly and using a larger pan (8×8-inch). They’ll be extra chewy and decadent—perfect for a crowd!
With these pro tips and variations, you’ll be able to customize your red velvet brownies to suit your tastes. Whether you stick with the classic version or try one of these creative twists, you can’t go wrong. Happy baking!
Serving Suggestions for Red Velvet Brownies
Now that your red velvet brownies are baked and ready to enjoy, it’s time to get creative with how you serve them! Whether you’re looking to impress guests or simply treat yourself, here are some delicious serving ideas that will take your brownies to the next level.
1. Classic with a Scoop of Ice Cream
There’s no better way to enjoy a rich red velvet brownie than with a scoop of vanilla ice cream on top. The cold, creamy ice cream perfectly balances the warm, fudgy texture of the brownies. For a twist, you could also try cream cheese ice cream or even chocolate ice cream for an indulgent experience.
2. Serve with Fresh Berries
Brighten up your dessert by adding a handful of fresh berries—raspberries, strawberries, or blueberries are great options. The tartness of the berries complements the sweetness of the cream cheese frosting and adds a fresh pop of flavor that pairs beautifully with the red velvet cake brownies cream cheese combo.
3. Make It a Party Dessert
For a fun, party-ready treat, cut the red velvet cheesecake brownies into bite-sized squares and serve them on a platter with whipped cream or even a drizzle of chocolate sauce. You can even add a few sprinkles of edible glitter or colored sugar for a festive touch!
4. Perfect with Coffee or Hot Chocolate
Pair your brownies with a nice cup of coffee, espresso, or a cozy mug of hot chocolate. The richness of the brownie complements the boldness of the coffee or the sweetness of the hot chocolate. It’s the perfect dessert to wind down with after a long day.
5. Top with More Frosting or a Drizzle
If you love cream cheese frosting (who doesn’t?), try drizzling extra frosting on top of your red velvet brownies before serving. You can also get creative by adding a drizzle of chocolate ganache, caramel, or even a dusting of cocoa powder to enhance the flavor and make your brownies look extra indulgent.
6. Serve on a Beautiful Cake Stand
For an extra touch of elegance, display your red velvet and cheesecake brownies on a cake stand. The visual appeal of the cake stand elevates your simple dessert into a showstopper. Your guests will be impressed, and it’ll make your brownies feel extra special.
7. Gift Them as a Homemade Treat
Red velvet brownies make a wonderful gift for birthdays, holidays, or just to show someone you care. Package them in a cute box or wrap them in parchment paper with a ribbon for a charming homemade gift that anyone will appreciate.
8. Layer with a Simple Fruit Compote
For a more sophisticated dessert, top your red velvet cake brownies with a warm fruit compote, such as a strawberry compote or a raspberry sauce. This adds a tangy, fruity contrast to the richness of the brownies and complements the tangy cream cheese frosting beautifully.
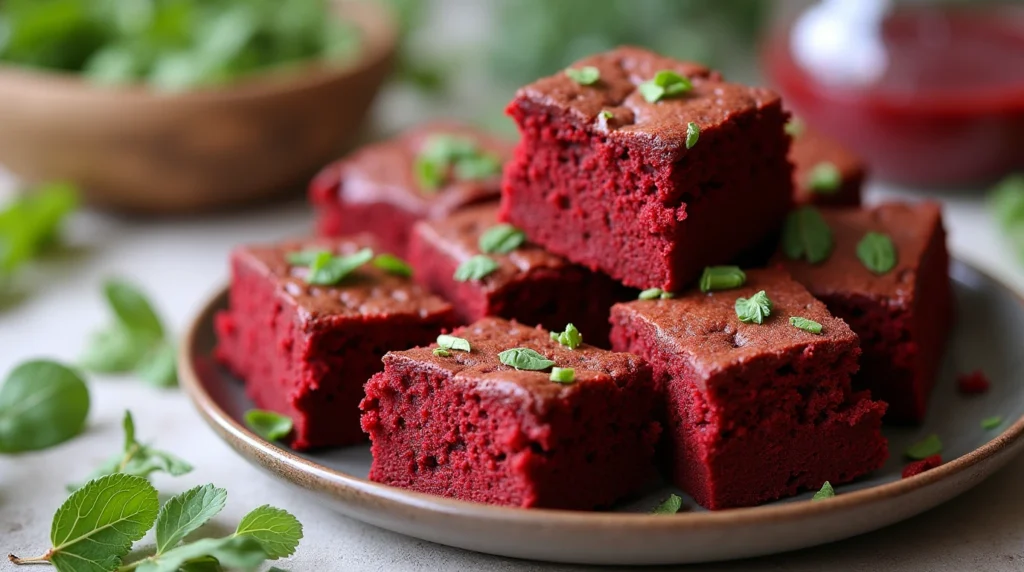
With these serving suggestions, your red velvet brownies will be the star of the show, no matter the occasion. Whether you’re serving them for a cozy night in or a festive celebration, there’s a way to make them even more enjoyable and memorable. Enjoy your baking!
Conclusion: Why You’ll Love These Red Velvet Brownies
There’s something magical about red velvet brownies—they’re rich, decadent, and visually stunning. Whether you’re a long-time fan of red velvet or simply looking for a new dessert to try, these brownies are sure to impress. The combination of fudgy brownies and cream cheese frosting creates the perfect balance of sweetness and tang, making each bite an unforgettable experience.
Not only are these red velvet cheesecake brownies easy to make, but they also leave plenty of room for customization. From chocolate chip add-ins to swirls of creamy cheesecake filling, the possibilities are endless. Plus, they make a beautiful centerpiece for any dessert table and are perfect for gifting or celebrating special occasions.
Why These Brownies Stand Out
- Rich Red Velvet Flavor – The vibrant red color and subtle cocoa flavor make these brownies visually striking and delicious.
- Creamy, Dreamy Frosting – The cream cheese frosting takes these brownies to the next level, adding a tangy contrast to the rich brownie base.
- Versatile and Customizable – You can easily modify the recipe to suit your preferences, whether by adding chocolate chips, nuts, or even a cheesecake swirl.
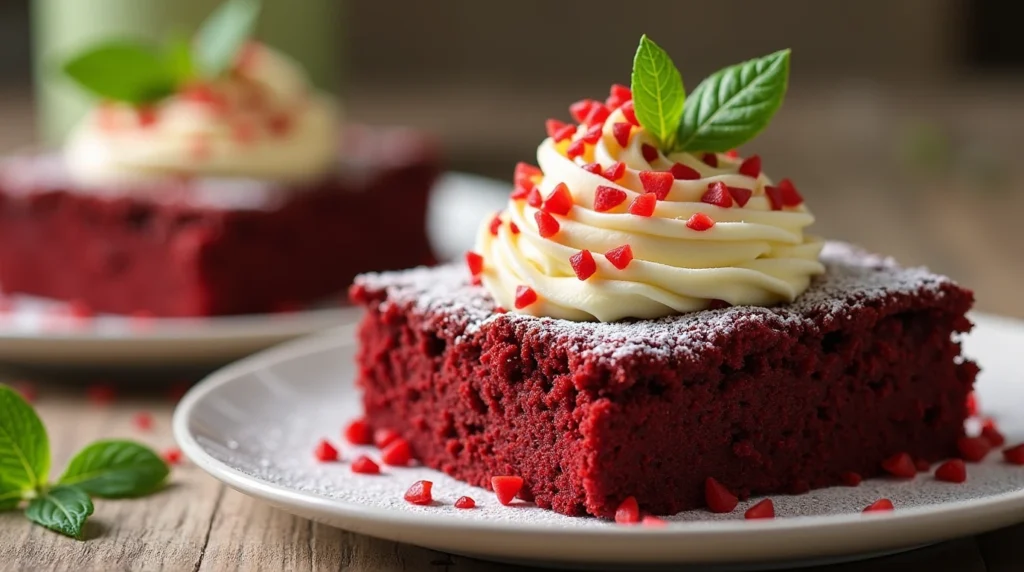
So, the next time you’re craving something sweet, make these red velvet brownies with cream cheese frosting. They’re a crowd-pleaser, and I promise you’ll fall in love with them just as much as I did! Enjoy the perfect blend of flavors and textures in every bite. Happy baking!
RED VELVET BROWNIES
Equipment
- 8×8-inch baking pan
- Mixing bowls
- Electric mixer or whisk
- Measuring Cups and Spoons
- Rubber spatula
- Parchment paper
- Wire rack for cooling
Ingredients
For the Brownies
- 1/2 cup 115g unsalted butter, melted
- 1 cup 200g granulated sugar
- 2 large eggs
- 1 teaspoon vanilla extract
- 1 tablespoon red food coloring
- 1/4 cup 25g unsweetened cocoa powder
- 3/4 cup 95g all-purpose flour
- 1/4 teaspoon salt
- 1 teaspoon white vinegar
For the Cream Cheese Frosting
- 4 oz 113g cream cheese, softened
- 2 tablespoons unsalted butter softened
- 1 cup 120g powdered sugar
- 1/2 teaspoon vanilla extract
Instructions
Step 1: Prepare the Batter
- Preheat your oven to 350°F (175°C) and line an 8×8-inch baking pan with parchment paper.
- In a mixing bowl, whisk together the melted butter and sugar until smooth.
- Add the eggs, vanilla extract, and red food coloring, mixing until fully combined.
- Stir in the cocoa powder, flour, salt, and white vinegar, folding gently until a smooth batter forms.
Step 2: Bake the Brownies
- Pour the batter into the prepared baking pan, smoothing the top with a spatula.
- Bake for 28-30 minutes or until a toothpick inserted in the center comes out with a few moist crumbs.
- Allow the brownies to cool in the pan for 10 minutes, then transfer to a wire rack to cool completely.
Step 3: Make the Cream Cheese Frosting
- In a bowl, beat the cream cheese and butter until smooth and creamy.
- Gradually add the powdered sugar and vanilla extract, beating until light and fluffy.
Step 4: Assemble and Serve
- Spread the frosting evenly over the cooled brownies.
- Slice into 12 squares and serve with fresh berries or a drizzle of melted chocolate.
Notes
- For a fudgier texture: Slightly underbake and let the brownies set while cooling.
- For extra flavor: Add 1/2 teaspoon of espresso powder to enhance the chocolate richness.
- Make ahead: Store brownies in an airtight container in the fridge for up to 5 days.
- Freezing tip: Wrap individual brownies in plastic wrap and freeze for up to 3 months.
FAQs About Red Velvet Brownies
Let’s answer some of the most frequently asked questions to help you get the best results when making these irresistible red velvet brownies. Whether you’re a baking pro or a beginner, these tips and tricks will help ensure success every time!
1. Can I make these brownies ahead of time?
Absolutely! Red velvet brownies can be made ahead of time and stored. Once they’ve cooled completely, store them in an airtight container at room temperature for up to 3 days. If you want to keep them fresh longer, you can refrigerate them for up to a week. Just make sure to bring them to room temperature before serving for that perfect fudgy texture.
2. Can I use a box mix for the brownies?
While this recipe is homemade, you can use a red velvet cake mix as a shortcut. Simply follow the instructions on the box for the brownie base and then proceed with adding the cream cheese frosting as directed. However, I highly recommend trying the from-scratch version for a richer and more authentic taste!
3. What if I don’t like cream cheese frosting?
No problem! You can swap the cream cheese frosting for a chocolate ganache or even a simple buttercream frosting. Red velvet cake brownies are versatile, and you can play around with different frosting options to suit your taste.
4. How do I get the perfect texture?
To get that perfect texture, be sure to not overbake the brownies. The top should look set and slightly cracked, but the center should remain soft and fudgy. When a toothpick is inserted, it should come out with just a few moist crumbs, not completely clean.
5. Can I add mix-ins to the brownie batter?
Definitely! If you want to add a little extra texture and flavor, try stirring in chocolate chips, walnuts, or even a bit of toffee to the batter before baking. These add-ins pair beautifully with the cream cheese frosting and make your red velvet cheesecake brownies even more special.
6. Can I make this recipe gluten-free?
Yes! To make gluten-free red velvet brownies, simply swap the all-purpose flour for a gluten-free flour blend. Just make sure it’s a 1:1 substitute, and you’ll still enjoy the same rich, tender texture.
7. Can I freeze these brownies?
You can! Red velvet brownies freeze wonderfully. Once they’ve completely cooled, slice them into squares and store them in a single layer in an airtight container or freezer-safe bag. They’ll keep in the freezer for up to 3 months. Just thaw at room temperature before serving, and you’re good to go!
8. Can I make these without the cheesecake layer?
If you prefer simple red velvet brownies, you can skip the cheesecake layer and just make the brownies on their own. They’ll still be delicious! However, the addition of cheesecake makes these brownies extra special and brings that classic red velvet cake flavor to life.
With these FAQs, you’re now all set to make your red velvet brownies a showstopper. Whether you’re tweaking the recipe or simply seeking storage tips, I hope these answers help you feel confident and ready to bake! If you have any other questions, feel free to drop them in the comments below. Happy baking!
There are no reviews yet. Be the first one to write one.
Have you tried this recipe?
Proudly powered by WordPress

